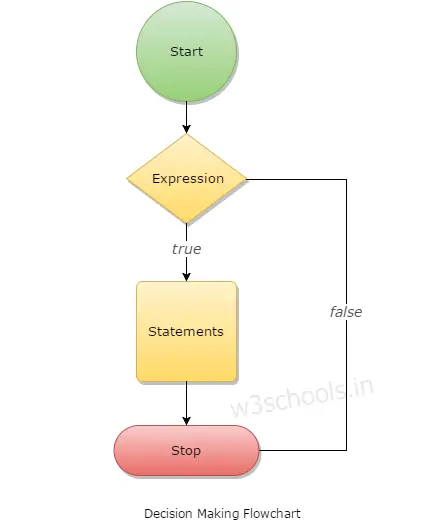
When programmers write code, it is essential to tell the computer what it has to do in a different situation. For Example, when a calculator program is designed, the user presses the sum button, and then the decision should have to be feed to the program that the program must add the numbers pressed by the user. For other cases also, the decision must have to set for making decisions within a program. So the decision plays a significant role in every programming language. In this chapter, you will learn about the decision-making statements that are provided by the Swift language.
What is Decision Making in Swift?
This type of program statement requires that the programmer sets several conditions for evaluation within a program. The statement(s) will get executed if the condition becomes true and optionally, alternative statement or set of statements will get executed if the condition becomes false.

Swift provides the following types of decision-making statements within its programming. They are:
- if statement
- if….else statement
- else if statement
- nested if statement
- switch statement
Now you will learn about each of them one by one.
if statement
The first and most common in all programming language is if It controls the flow of program through user's permission. This conditional statement works only if the condition is true.
Syntax:
if boolean_expression {

/* statement(s) will execute if the boolean expression is true */

}
Example:
import Cocoa

var a1:Int = 60;

if a1 > 42 {

/* if the condition is true then print */

println("1st Varable is greater than 42");

}
println("The value of variable is \(a1)")
if...else statement
Here the if statement is followed with an optional else statement and that else statement gets execute only if the Boolean expression (i.e., the condition) gets false. The general form of the statement is:
Syntax:
if boolean_expression {

// statement(s) will execute if the boolean expression is true

} else {

//  otherwise statement(s) will execute if the boolean expression is false

}
Example:
var g:Int = 800;

if g < 60 {

println("Value is less than 60");

} else {

println("Value is not less than 60");

}

println("Value of variable is \(g)");
else if statement
An if statement can be followed by an optional else if...else statement, which is very useful for testing multiple conditions using single if...else if statement.
Syntax:
if boolean_expression_1 {

} else if boolean_expression_2 {

.

} else if boolean_expression_n {

. . . . . .

} else {

}
Nested if statement
It is always legal in Swift to nest if-else statements, which means programmers can use one if or else if statement inside another if or else if statement.
The syntax for nested if statement in Swift is:
Syntax:
if boolean_expression_1 {

// Executes when the boolean expression 1 is true

if boolean_expression_2 {

// Executes when the boolean expression 2 is true

}

}
Switch Statement
There is another form of a conditional statement to control the flow of your code, which is the switch statement. Here a different block or case is executed. As the case value matches the block of the statement following the case gets executed. The syntax of the Switch statement in Swift is:
Syntax:
switch expression {

case expression1  :

statement(s)

fallthrough // optional

case expression2, expression3  :

statement(s)

fallthrough //optional

default : // Optional

statement(s);

}
Here, if you do not use fallthrough statement, then the program will come out of switch statement after executing the matching case statement. So the fallthrough statement is equally important in executing Switch statements of Swift language.
Example:
import Cocoa

var value = 20

switch index {

case 60  :

println( "Value of index is 60")

fallthrough

case 20,30  :

println( "the value is either 20 or 30")

fallthrough

case 40  :

println( "The value is 40")

default :

println( "Wrong Case Input")

}
Output:
the value is either 20 or 30
The value is 40