Adding a new page is essential because there are situations when you want to create new web pages for your site, which may contain additional content, or you redirect a link to a new page that contains information regarding that topic or link. As you all know, a website can have multiple pages; these pages can be created in WordPress using this feature. In this tutorial, you will learn how to deal with pages in WordPress.
What Are Pages in WordPress?
Creating pages for your website is similar to creating Posts in WordPress. Pages are a collective set of static content that does not change its display information dynamically during the website run. Let us now get to know how to add or make a page in WordPress.
How to Add a New Page in WordPress?
Here are the steps to add new pages in WordPress, and this is similar to adding a new post:
- To add a new Post on your website through WordPress, you must log in to the WordPress account.
- You will now see the screen of the Dashboard.
- On the left side of your Dashboard, you will see Admin Sidebar Menu.
- Go to the Pages on the menu and choose Add New.
- Now you will see a new screen where you will be given the option to add a title and content for your web page.
- There are two primary components of this screen:
- Title: This is an input field where you can insert the title of your page
- Content: This is a textarea where you have to inscribe the content for the page. It can be used in two different ways:
- Visual mode: This is where you can write in a regular format by using WYSIWYG Editor.
- Text mode: This is where you can write in HTML format like in Windows Notepad.
What Is a WYSIWYG Editor?
WYSIWYG Editor has similar capabilities to a Word Processor, and it is a primary interface where you can draft and format your content. Various buttons for editing formatting include Bold, Italic, Word Strike, Bullet-List, Number-List, Block-Quote, Left, Right Alignment, Justify, Add-Link, Distraction-Free Writing Toggle Button, Toggle Toolbar, and the horizontal line.
Publishing a New Page in WordPress
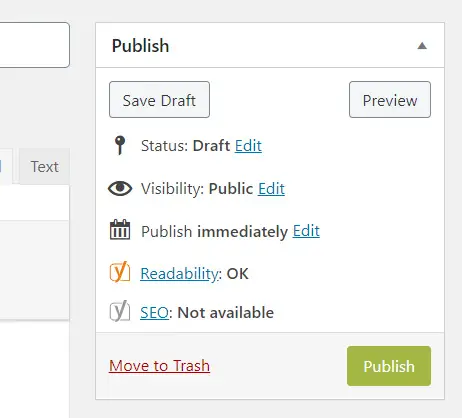
Once you write your entire article or content, you can publish the page to the user by clicking the Publish button from the right window screen.
Here is the list of components that comes under the Publish section:
- Save Draft: This button saves the page as a draft.
- Preview: This button is for previewing the page before publishing.
- Move to Trash: This link is for deleting the page.
- Status: This option is to change the current status of the page, whether it is published, pending, or under reviewer draft.
- Visibility: This option is to modify the page's visibility to public, private, or password protected.
- Published: This option is for setting the date and time of publication.
Edit Existing Page
You must go to Menu> All Pages to edit a post. There you will see the list of all created pages. Hover your mouse over any page; You will see the option of Edit and Quick Edit. You can use any one of the options to make changes to your page.
Delete Existing Page
You must go to Pages > All Pages to delete a page. There you will see the list of all existing pages. Hover your mouse over any page; you will see a Trash link allowing you to delete the page.