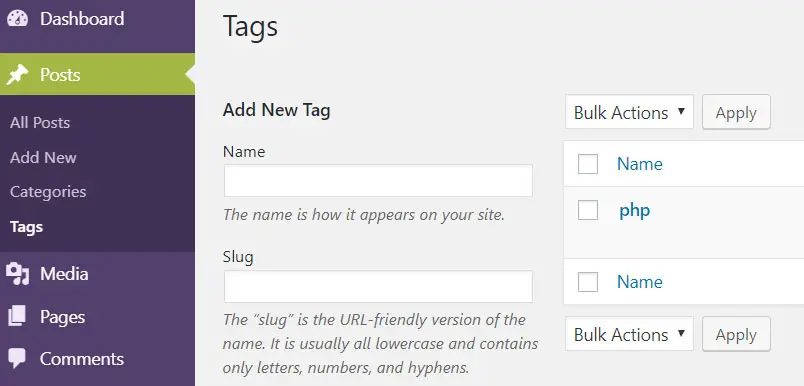
Tagging your WordPress posts into specific keywords and terms will allow you to categorize your content and articles within your website. Hence tagging is an essential element of WordPress, which makes SEO much more comfortable, and this feature is provided in the form of a tool in WordPress, though it is optional. In this tutorial, you will learn about the concept of tags and how to use them.
What Are WordPress Tags?
WordPress Tags can be defined as a set of information you can attach to your WordPress content to categorize and better identify content. Each post has many tags that allow the visitors to click on a tag to find related posts with the same tag. When you mention a tag correctly, it not only helps readers easily find content but also helps in search optimization.
How to Include Tags in Your WordPress Post?
The steps to include tags in your posts are:
- Log in to WordPress and go to your dashboard.
- From there, you have to navigate to Posts > Tags.
- You will now see a new screen, the "Tags" page.
- From that page, you have to fill all the required fields that are discussed below:
- Name: This is where you will name the category, which will be unique.
- Slug: This is an editable part of the URL.
- Description: This option is also optional. Here, you will find a text box to write a brief description of your tag.
- After inserting all the above information, you must click the "Add New Tag" button.
- This will bring the newly created tag on the right side of the page, which you can see on your screen.

Editing Tags in WordPress
Here is a list of simple steps that you can follow to edit tags in WordPress:
- From the dashboard, go to your Posts menu.
- From there, choose the Tags option.
- You can view the tags you have created previously using the steps mentioned above.
- As you hover the mouse cursor on the Tags, you will see a few options below the Tag name.
- You can choose either the Edit or the Quick Edit option.
- Now, edit any of the desired fields you want to modify and click the Update button to reflect the changes.
Deleting Tags in WordPress
If you want to remove the tag from your WordPress post altogether, you need to follow some specific steps or approaches.
- From the dashboard, go to your Posts menu.
- From there, choose the Tags option.
- You can view the tags that you have created previously using the steps mentioned above.
- As you hover the mouse cursor on the Tags, you will see a few options below the Tag name.
- From there, you can either choose the Delete option.
- A pop-up dialog box will ask for confirmation. Click OK to delete the tag.